环境为 centos7.9 , kubernetes 1.2
| K8S角色 | IP | 主机名 | |
| 控制节点 | 192.168.44.180 | k8smaster1 | |
| 控制节点 | 192.168.44.181 | K8smaster2 | |
| 工作节点 | 192.168.44.182 | K8snode1 | |
| vip | 192.168.44.199 |
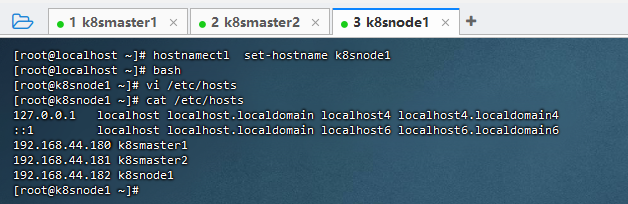
1,设置主机名:
[root@localhost ~]# hostnamectl set-hostname k8snode1
[root@localhost ~]# bash
[root@k8snode1 ~]#

2,配置hosts互联互通。
[root@k8snode1 ~]# vi /etc/hosts
192.168.44.180 k8smaster1
192.168.44.181 k8smaster2
192.168.44.182 k8snode1
3,配置免密登录
[root@k8snode1 ~]# ssh-keygen
[root@k8snode1 ~]# ssh-copy-id k8snode1
/usr/bin/ssh-copy-id: INFO: Source of key(s) to be installed: “/root/.ssh/id_rsa.pub”
The authenticity of host ‘k8snode1 (192.168.44.182)’ can’t be established.
ECDSA key fingerprint is SHA256:vBIdQBeejtZg+1AyAJq1Vdo170PaW8FzjwSukbxxQZY.
ECDSA key fingerprint is MD5:52:ab:51:d7:37:86:9b:f8:b7:61:a0:61:87:7f:aa:5e.
Are you sure you want to continue connecting (yes/no)? yes
/usr/bin/ssh-copy-id: INFO: attempting to log in with the new key(s), to filter out any that are already installed
/usr/bin/ssh-copy-id: INFO: 1 key(s) remain to be installed — if you are prompted now it is to install the new keys
root@k8snode1’s password:
Number of key(s) added: 1
Now try logging into the machine, with: “ssh ‘k8snode1′”
and check to make sure that only the key(s) you wanted were added.
[root@k8snode1 ~]#
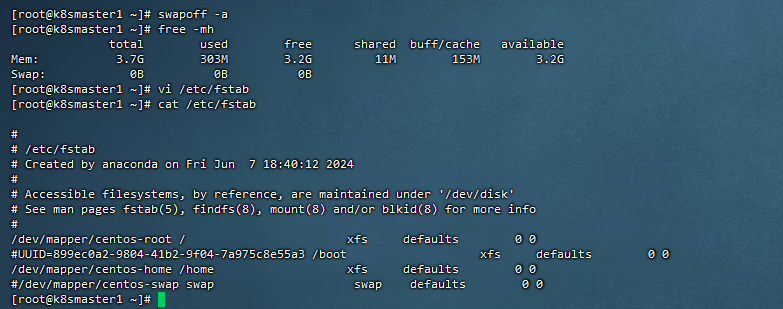
4,关闭Swap
[root@k8smaster1 ~]# swapoff -a
[root@k8smaster1 ~]# free -mh
[root@k8smaster1 ~]# vi /etc/fstab
[root@k8smaster1 ~]# cat /etc/fstab
[root@k8smaster1 ~]#
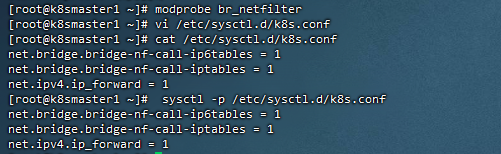
5,修改内核参数
[root@k8smaster1 ~]# modprobe br_netfilter
[root@k8smaster1 ~]# vi /etc/sysctl.d/k8s.conf
[root@k8smaster1 ~]# cat /etc/sysctl.d/k8s.conf
net.bridge.bridge-nf-call-ip6tables = 1
net.bridge.bridge-nf-call-iptables = 1
net.ipv4.ip_forward = 1
[root@k8smaster1 ~]# sysctl -p /etc/sysctl.d/k8s.conf
net.bridge.bridge-nf-call-ip6tables = 1
net.bridge.bridge-nf-call-iptables = 1
net.ipv4.ip_forward = 1
6,关闭防火墙firewalld
[root@k8smaster1 ~]# systemctl stop firewalld && systemctl disable firewalld
Removed symlink /etc/systemd/system/multi-user.target.wants/firewalld.service.
Removed symlink /etc/systemd/system/dbus-org.fedoraproject.FirewallD1.service.
[root@k8smaster1 ~]#

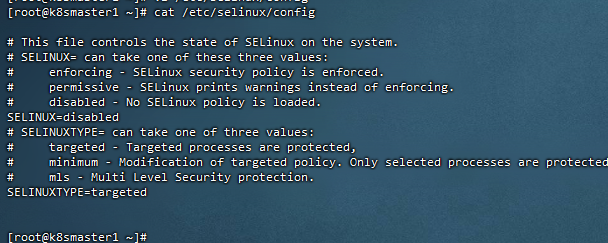
7,设置seliunx
[root@k8smaster1 ~]# vi /etc/selinux/config
[root@k8smaster1 ~]# cat /etc/selinux/config
[root@k8smaster1 ~]#
8,配置阿里源
先备份原来的,在上传新的
[root@k8smaster2 ~]# cd /etc/yum.repos.d/
[root@k8smaster2 yum.repos.d]# mkdir /root/ropo.bak
[root@k8smaster2 yum.repos.d]# mv * /root/ropo.bak
[root@k8smaster2 yum.repos.d]#

9,重载源,添加docker源
sudo yum clean all
sudo yum makecache
[root@k8snode1 yum.repos.d]# yum-config-manager –add-repo http://mirrors.aliyun.com/docker-ce/linux/centos/docker-ce.repo
[root@k8snode1 yum.repos.d]#

10,配置安装k8s组件需要的阿里源
[root@k8smaster1 ~]# vi /etc/yum.repos.d/kubernetes.repo
[root@k8smaster1 ~]# cat /etc/yum.repos.d/kubernetes.repo

11,配置时间同步


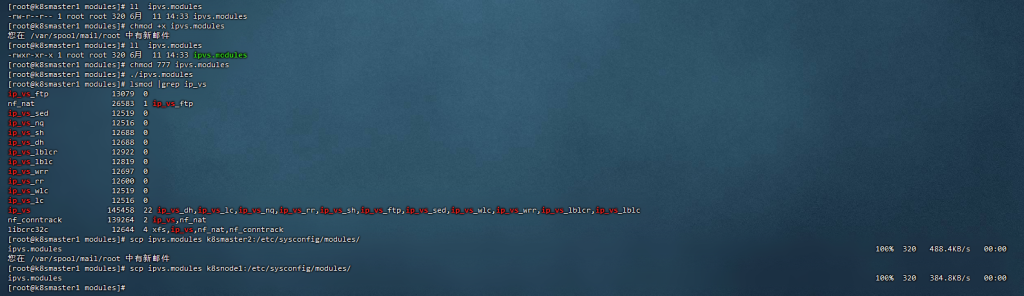
12,开启IPVS
[root@k8smaster2 yum.repos.d]# cd /etc/sysconfig/modules/
[root@k8smaster2 modules]# ./ipvs.modules
[root@k8smaster2 modules]# lsmod|grep ip_vs
13,基础软件包
[root@k8smaster1 modules]# yum install -y yum-utils device-mapper-persistent-data lvm2 wget net-tools nfs-utils Irssz gcc gcc-c++ make cmake libxml2-devel openssl-devel curl curl-devel unzip sudo ntp libaio-devel wget vim ncurses-devel autoconf automake zlib-devel python-devel epel-release openssh-server socat ipvsadm conntrack ntpd ntupdate telnet ipvsadm

14,安装iptables
[root@k8snode1 modules]# yum install -y iptables-services
[root@k8snode1 modules]# service iptables stop && systemctl disable iptables
Redirecting to /bin/systemctl stop iptables.service
[root@k8snode1 modules]# iptables -F
15,安装docker服务
[root@k8smaster1 modules]# yum install docker-ce-20.10.6 docker-ce-cli-20.10.6 containerd.io -y
[root@k8smaster1 modules]# systemctl start docker && systemctl enable docker && systemctl status docker
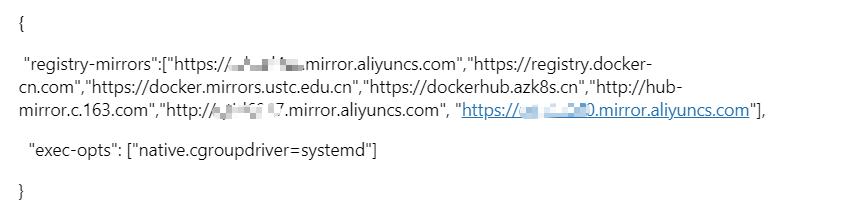
配置镜像加速:
[root@k8smaster1 modules]# vim /etc/docker/daemon.json
[root@k8smaster1 modules]# cat /etc/docker/daemon.json
[root@k8smaster1 modules]# systemctl daemon-reload && systemctl restart docker
[root@k8smaster1 modules]# scp /etc/docker/daemon.json k8smaster2:/etc/docker/daemon.json
[root@k8smaster1 modules]#

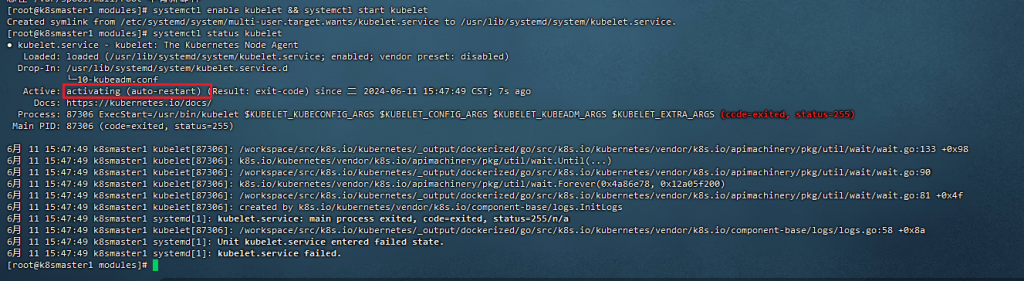
16、安装初始化K8s需要的软件包
[root@k8smaster1 modules]# yum install -y kubelet-1.20.6 kubeadm-1.20.6 kubectl-1.20.6
[root@k8smaster1 modules]# systemctl enable kubelet && systemctl start kubelet
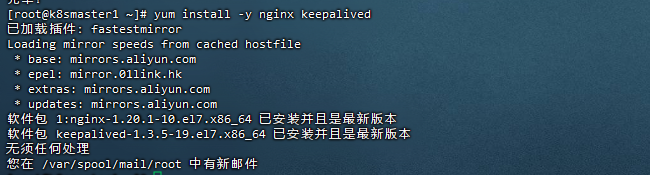
17,安装keepalive+nginx
[root@k8smaster1 ~]# yum install -y nginx keepalived
122 yum install -y nginx keepalived
123 vim /etc/nginx/nginx.conf
user nginx;
worker_processes auto;
error_log /var/log/nginx/error.log;
pid /run/nginx.pid;
include /usr/share/nginx/modules/*.conf;
events {
worker_connections 1024;
}
# 四层负载均衡,为两台Master apiserver组件提供负载均衡
stream {
log_format main '$remote_addr $upstream_addr - [$time_local] $status $upstream_bytes_sent';
access_log /var/log/nginx/k8s-access.log main;
upstream k8s-apiserver {
server 192.168.40.180:6443; # Master1 APISERVER IP:PORT
server 192.168.40.181:6443; # Master2 APISERVER IP:PORT
}
server {
listen 16443; # 由于nginx与master节点复用,这个监听端口不能是6443,否则会冲突
proxy_pass k8s-apiserver;
}
}
http {
log_format main '$remote_addr - $remote_user [$time_local] "$request" '
'$status $body_bytes_sent "$http_referer" '
'"$http_user_agent" "$http_x_forwarded_for"';
access_log /var/log/nginx/access.log main;
sendfile on;
tcp_nopush on;
tcp_nodelay on;
keepalive_timeout 65;
types_hash_max_size 2048;
include /etc/nginx/mime.types;
default_type application/octet-stream;
server {
listen 80 default_server;
server_name _;
location / {
}
}
}
126 vim /etc/keepalived/keepalived.conf
global_defs {
notification_email {
acassen@firewall.loc
failover@firewall.loc
sysadmin@firewall.loc
}
notification_email_from Alexandre.Cassen@firewall.loc
smtp_server 127.0.0.1
smtp_connect_timeout 30
router_id NGINX_MASTER
}
vrrp_script check_nginx {
script "/etc/keepalived/check_nginx.sh"
}
vrrp_instance VI_1 {
state MASTER
interface ens33 # 修改为实际网卡名
virtual_router_id 51 # VRRP 路由 ID实例,每个实例是唯一的
priority 100 # 优先级,备服务器设置 90
advert_int 1 # 指定VRRP 心跳包通告间隔时间,默认1秒
authentication {
auth_type PASS
auth_pass 1111
}
# 虚拟IP
virtual_ipaddress {
192.168.40.199/24
}
track_script {
check_nginx
}
}
127 vim /etc/keepalived/check_nginx.sh
#!/bin/bash
count=$(ps -ef |grep nginx | grep sbin | egrep -cv "grep|$$")
if [ "$count" -eq 0 ];then
systemctl stop keepalived
fi
128 chmod +x /etc/keepalived/check_nginx.sh
130 systemctl daemon-reload
131 yum install nginx-mod-stream -y
132 systemctl start nginx
133 systemctl start keepalived
134 systemctl enable nginx keepalived
135 systemctl status keepalived
136 ip a
验证:停止master1nginx VIP会飘到matser2
137 systemctl stop nginx
138 ip a
恢复:重载master1systemctl,启动master1 nginx VIP漂回来
141 systemctl daemon-reload
142 systemctl start nginx
143 systemctl start keepalived
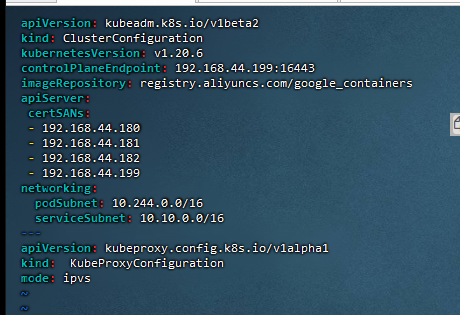
18,kubeadm初始化K8S在master1上
[root@k8smaster1 ~]# vim kubeadm-config.yaml
[root@k8smaster1 ~]# docker load -i k8simage-1-20-6.tar.gz
[root@k8smaster1 ~]# kubeadm init –config kubeadm-config.yaml –ignore-preflight-errors=SystemVerification
Your Kubernetes control-plane has initialized successfully!
To start using your cluster, you need to run the following as a regular user:
mkdir -p $HOME/.kube
sudo cp -i /etc/kubernetes/admin.conf $HOME/.kube/config
sudo chown $(id -u):$(id -g) $HOME/.kube/config
Alternatively, if you are the root user, you can run:
export KUBECONFIG=/etc/kubernetes/admin.conf
You should now deploy a pod network to the cluster.
Run "kubectl apply -f [podnetwork].yaml" with one of the options listed at:
You can now join any number of control-plane nodes by copying certificate authorities
and service account keys on each node and then running the following as root:
kubeadm join 192.168.44.199:16443 --token i56rqr.5yzd40ecqb11x9oy \
--discovery-token-ca-cert-hash sha256:86ca482804bc4cb96c05ac856772c7420a8d9f359c826a136954ff5df1302da9 \
--control-plane
Then you can join any number of worker nodes by running the following on each as root:
kubeadm join 192.168.44.199:16443 --token i56rqr.5yzd40ecqb11x9oy \
--discovery-token-ca-cert-hash sha256:86ca482804bc4cb96c05ac856772c7420a8d9f359c826a136954ff5df1302da9
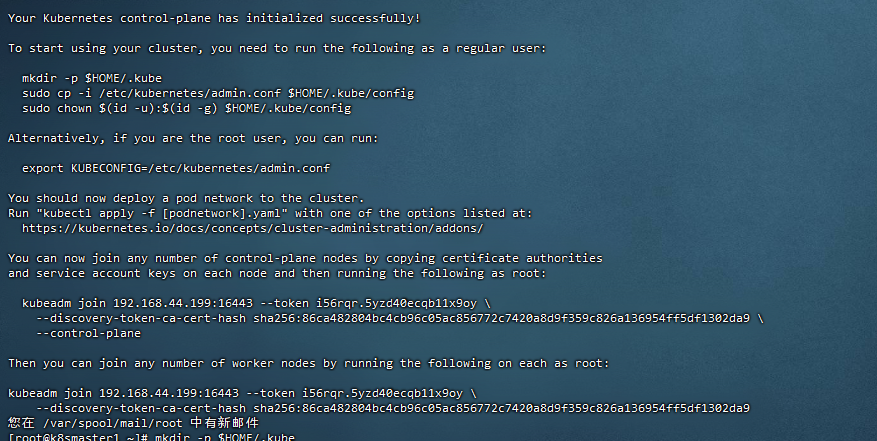
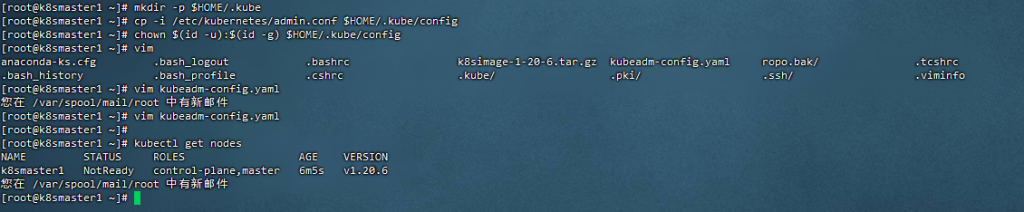
[root@k8smaster1 ~]# mkdir -p $HOME/.kube
[root@k8smaster1 ~]# cp -i /etc/kubernetes/admin.conf $HOME/.kube/config
[root@k8smaster1 ~]# chown $(id -u):$(id -g) $HOME/.kube/config
19,扩容,添加master节点
[root@k8smaster2 ~]# cd /root && mkdir -p /etc/kubernetes/pki/etcd && mkdir -p ~/.kube/
拷贝maser1证书到master2
[root@k8smaster1 pki]# scp /etc/kubernetes/pki/ca.crt ca.key sa.key sa.pub front-proxy-ca.crt front-proxy-ca.key k8smaster2:/etc/kubernetes/pki/
[root@k8smaster1 etcd]# scp /etc/kubernetes/pki/etcd/ca.crt ca.key k8smaster2:/etc/kubernetes/pki/etcd/
[root@k8smaster1 ~]# kubeadm token create –print-join-command
kubeadm join 192.168.44.199:16443 –token yx1h2w.eyd3yzxqrm417bqk –discovery-token-ca-cert-hash sha256:86ca482804bc4cb96c05ac856772c7420a8d9f359c826a136954ff5df1302da9
[root@k8smaster2 ~]# kubeadm join 192.168.44.199:16443 –token yx1h2w.eyd3yzxqrm417bqk –discovery-token-ca-cert-hash sha256:86ca482804bc4cb96c05ac856772c7420a8d9f359c826a136954ff5df1302da9 –control-plane –ignore-preflight-errors=SystemVerification

[root@k8smaster2 ~]# mkdir -p $HOME/.kube
[root@k8smaster2 ~]# cp -i /etc/kubernetes/admin.conf $HOME/.kube/config
[root@k8smaster2 ~]# chown $(id -u):$(id -g) $HOME/.kube/config
异常处理:如果加入失败,清空manifests pki目录,重新从master1导入证书,在加入kubeadm join
20,添加工作节点,k8snode1
[root@k8smaster1 ~]# kubeadm token create –print-join-command
kubeadm join 192.168.44.199:16443 –token q9xqfd.hqyjzuqzibh6c42t –discovery-token-ca-cert-hash sha256:86ca482804bc4cb96c05ac856772c7420a8d9f359c826a136954ff5df1302da9
[root@k8snode1 ~]# kubeadm join 192.168.44.199:16443 –token q9xqfd.hqyjzuqzibh6c42t –discovery-token-ca-cert-hash sha256:86ca482804bc4cb96c05ac856772c7420a8d9f359c826a136954ff5df1302da9 –ignore-preflight-errors=SystemVerification

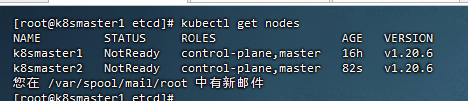
可以看到 node1 的 ROLES 角色为空,<none>就表示这个节点是工作节点。#可以把 /node1 的 ROLES 变成 work,按照如下方法:
[root@k8smaster1 ~]# kubectl label node k8snode1 node-role.kubernetes.io/worker=worker
node/k8snode1 labeled

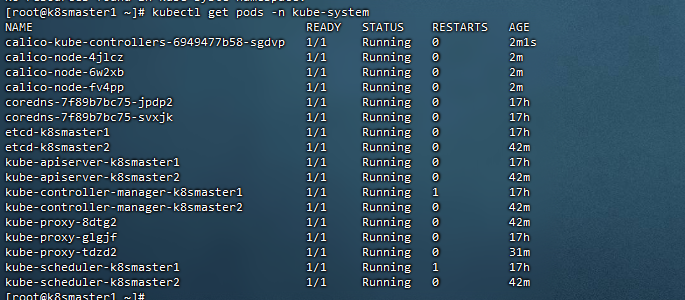
kube-system 命名空间中 Pod 运行节点
[root@k8smaster1 ~]# kubectl get pods -n kube-system
[root@k8smaster1 ~]# kubectl get pods -n kube-system -o wide
21,安装k8s网络组件-Calico
上传 calico.yaml 到 master1 上,使用 yaml 文件安装 calico 网络插件 。
[root@k8smaster1 ~]# kubectl apply -f calico.yaml

21,测试网络
[root@k8snode1 ~]# docker load -i busybox-1-28.tar.gz
[root@k8smaster1 ~]# kubectl run busybox –image busybox:1.28 –restart=Never –rm -it busybox — sh
测试
ping www.baidu.com
ping 其他podIP
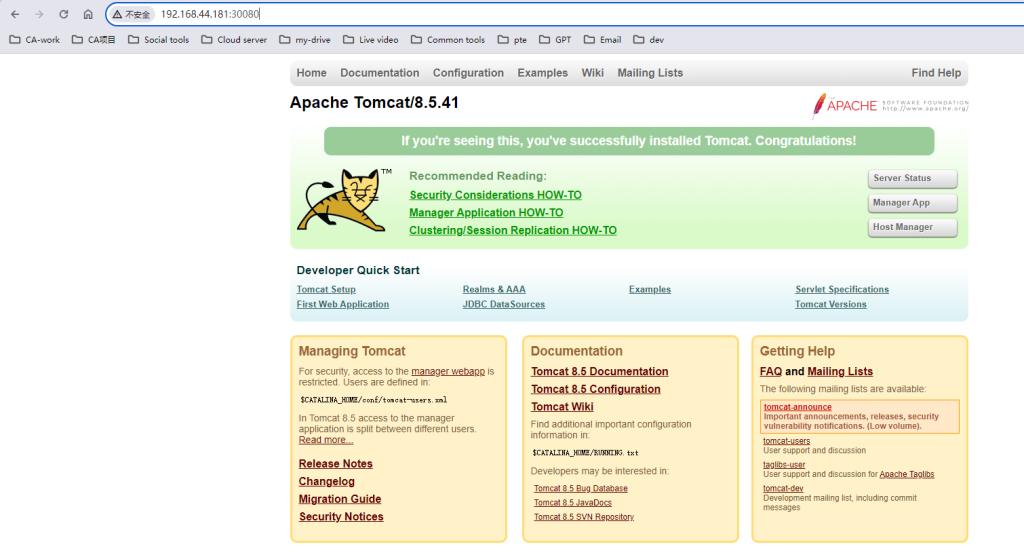
22,测试K8s集群部署中部署tomcat服务
[root@k8snode1 ~]# docker load -i tomcat.tar.gz
[root@k8smaster1 ~]# kubectl apply -f tomcat.yaml
[root@k8smaster1 ~]# kubectl apply -f tomcat-service.yaml

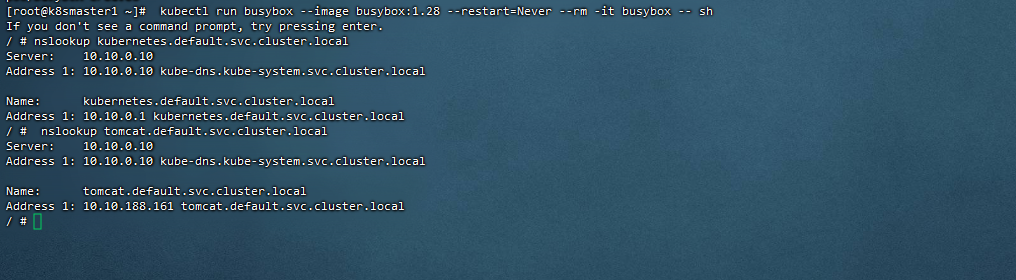
23,测试coreDNS
[root@k8smaster1 ~]# kubectl run busybox –image busybox:1.28 –restart=Never –rm -it busybox — sh